H2O casebooks can be read directly on the H2O platform, in a PDF reader via an exported and converted Word document, or printed via the Export button.
Casebook Navigation
Between resources
Once you begin reading a casebook in H2O, you’ll see arrows on either side of your screen. Use these to move back and forth between resources.
Between sections
You can use these same arrows to move between sections, but you’ll first go through all resources in a given section. If you’d like to quickly jump to a new section, click the ‘Casebook’ tab at the top of the book and scan for the section you want. When the casebook is very long or deeply nested, you can use the Collapse All button to more easily surface the section headings for navigation.
Searching within casebooks
When viewing a casebook, you’ll see a ‘Search inside’ tab along the top. Click into it and use the search bar to find keywords within a casebook.
Taking Notes
To allow students and any reader to make the most out of an H2O casebook, we have added a ‘Take Notes’ button that is visible to any logged in user who is not a Verified Professor. This tool allows you to leverage all of our annotation tools including ‘Highlight’, ‘Add note’, and ‘Add link’.Entire casebook
To take notes on an entire casebook, visit the main page of that casebook and click ‘Take Notes’. This will make a copy of the entire book as a Draft in your Dashboard where you can apply your own annotations and make any other changes you’d like to support your comprehension.
Specific resources
To take notes on a subset of resources within one or more casebooks, first create a notebook in your Dashboard by clicking ‘Create Casebook’ at the top of H2O. Name it something you will recognize. Then, navigate to the published resource(s) you want to take notes on, click ‘Clone’ and select your notebook as the destination for the copy of the resource. Repeat this process until you’ve added all desired resources to your notebook, where you can apply your own annotations and make any other changes you’d like to support your comprehension.
Export & Print
Exporting casebooks
You can export and print a full casebook, specific casebook sections or individual resources (such as a case). Just click the Export button to the right of the content you want to download and print, and select whether or not you would like to export with annotations included.
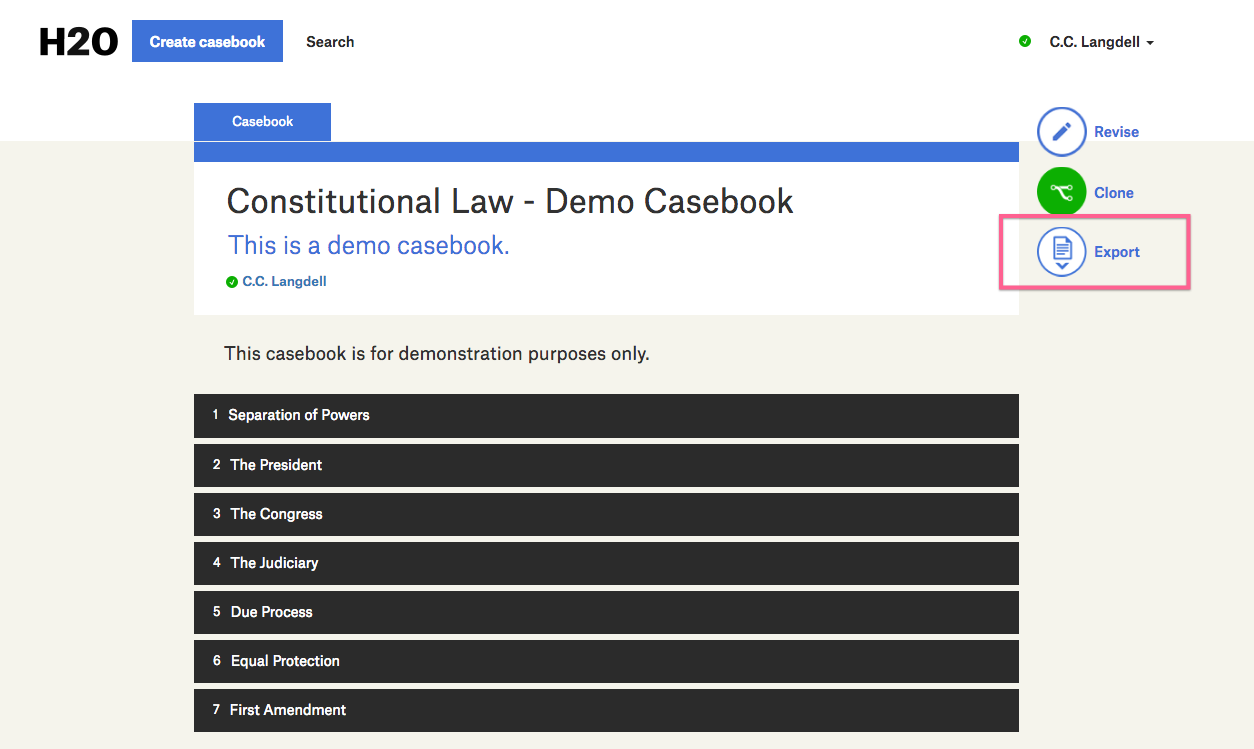
When you click the button, H2O will download a Microsoft Word file with whatever you chose to export. The download may take several seconds if you’re exporting a big casebook.
Because links point to content hosted outside of H2O, your export file will not contain the content of the linked page. Instead, only the URL of the linked page will appear in the exported file:

If you want to include the external content in the print version of the casebook, you can add it directly to the Word file or you can create a text resource in the casebook within H2O, and then paste in the given content. As always, please make sure any use like this is permitted by applicable copyright and license requirements.
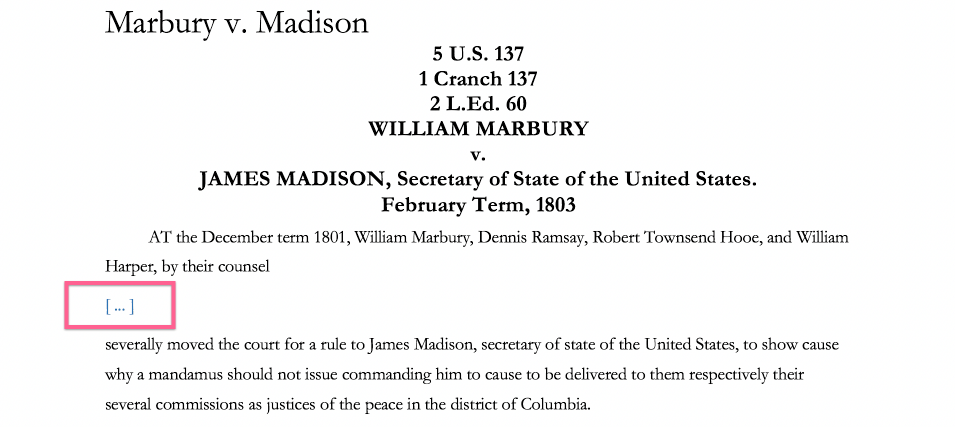
If you’ve chosen to export with annotations included, annotations in the online version of the casebook will carry over to the Word file, although those annotations will not be interactive. For example, text that you’ve hidden in H2O using an elision will not be present or accessible in the Word file; instead, the Word file will display an ellipsis in the position of the hidden text.
Working in Word
The exported Word file comes with pre-assigned styles, such as ‘resource title’ and ‘case text,’ using a default style template. This makes it easier for you to customize styling in Word, by making global changes to fonts, text-size and other characteristics of the text. Currently H2O offers only the default template.
H2O automatically generates a table of contents in Word for exported content. To add pages numbers to the table, right-click on it and select ‘Update Field.’ If you make changes to the document that affect item locations, you can repeat this process to re-generate accurate page numbers. Currently a table of contents is only generated when exporting a casebook, not an individual section.